When you are preparing for an exhibition or outdoor event in Australia, efficiency matters just as much as presentation. Whether you are showcasing your brand at the ICC Sydney, Melbourne Convention and Exhibition Centre, or a local outdoor market, the ability to set up quickly can make a huge difference. This is where Outdoor Pop-up Tents become a game changer.
Why Outdoor Pop-up Tents Are Built for Easy Setup
Outdoor Pop-up Tents are engineered with simplicity in mind. Unlike traditional structures that require multiple components and specialised tools, these tents feature collapsible frames and pre-attached canopies. This means you can focus more on your event strategy and less on the setup.
The intuitive design ensures that even first-time exhibitors can assemble the tent with confidence. It is all about saving time while still delivering a polished and professional look.
Step 1: Choose the Right Location
Before you begin assembling your Outdoor Pop-up Tents, selecting the right spot is essential. Look for a flat and stable surface to ensure the structure stands securely. This is especially important for outdoor exhibitions where uneven ground can affect stability.
Position your tent where it maximises visibility and foot traffic. A well-placed tent can naturally attract more visitors to your booth.
Step 2: Unpack and Prepare the Frame
Remove the frame from its carry bag and place it on the ground. Outdoor Pop-up Tents are designed with a folding frame that expands easily. At this stage, you do not need any tools. Simply ensure all parts are untangled and ready for expansion.
This preparation step helps avoid any interruptions during the setup process.
Step 3: Expand the Frame Structure
With one or two people, gently pull the frame outward from opposite corners. The structure will start to expand automatically. Outdoor Pop-up Tents are designed with a scissor-like mechanism that allows smooth extension without force.
Make sure the frame is partially expanded before attaching the canopy. This ensures proper alignment and reduces the risk of fabric strain.
Step 4: Attach the Canopy
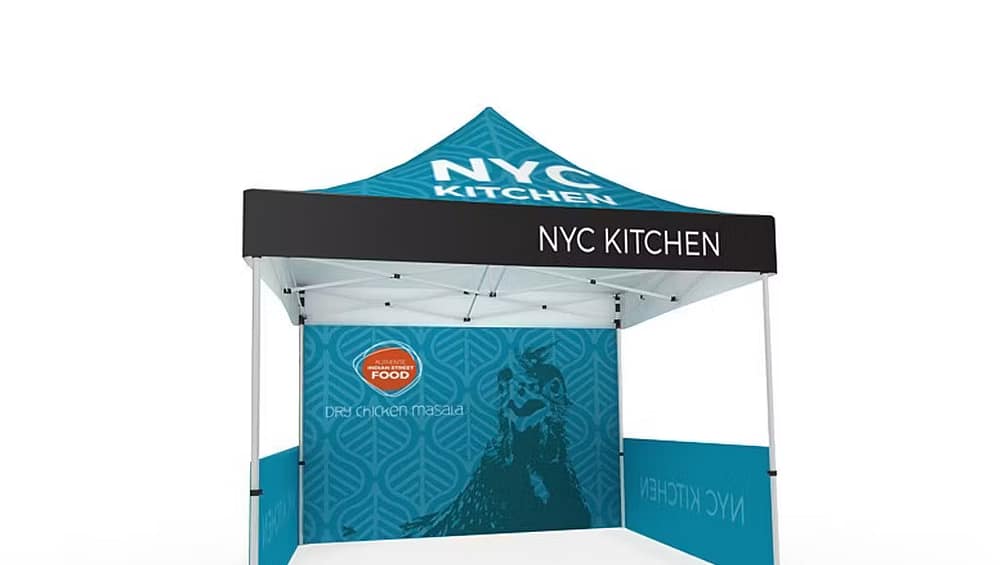
Most Outdoor Pop-up Tents come with a canopy that is either pre-attached or easy to secure using Velcro straps or clips. Place the canopy over the frame and fasten it at each corner.
Because no tools are required, this step is quick and straightforward. The canopy will begin to take shape as the frame expands further.
Step 5: Fully Extend and Lock the Frame
Continue expanding the frame until it reaches its full size. Once extended, lock the frame into place using the built-in sliders or push buttons. These locking mechanisms are designed for safety and stability without requiring additional equipment.
At this point, your Outdoor Pop-up Tent will already resemble a complete structure.
Step 6: Adjust the Height
Outdoor Pop-up Tents typically offer adjustable leg heights. Simply extend each leg to your preferred level and secure it using the locking pins. This flexibility allows you to customise the tent depending on your event requirements.
Higher settings can improve visibility, while lower settings may offer better wind resistance.
Step 7: Secure the Tent for Stability
For outdoor events, securing your tent is essential. Use the provided stakes, sandbags, or weights to anchor the structure. While the assembly itself requires no tools, these accessories help ensure your tent remains stable in varying weather conditions.
Ideal for Fast-Paced Events and Exhibitions
One of the biggest advantages of Outdoor Pop-up Tents is how quickly they can be assembled and packed down. This makes them perfect for:
- Trade shows and exhibitions
- Outdoor markets and festivals
- Promotional events and activations
- Corporate gatherings and community events
Their portability and ease of use allow you to move from one event to another without hassle.
Conclusion
Setting up a professional event space does not have to be complicated. With Outdoor Pop-up Tents, you can achieve a clean, branded, and functional setup in just minutes without using any tools.