Step 1: Unpack and Organise All Components
Before you begin assembling, lay out all parts in a clear, open space. Inside your kit, you will typically find:
-
Numbered aluminium frame sections
-
Connection fittings
-
Integrated LED components
-
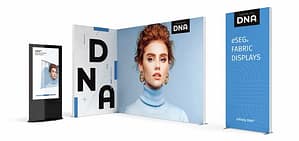
Tension fabric graphics
-
Rigging cables or attachment points
Check that everything matches your packing list. Organising components by number or shape will save time during assembly and reduce the risk of missing connections.
In Australian venues such as ICC Sydney or MCEC, setup time is often limited. Being organised from the start ensures a smoother installation process.
Step 2: Connect the Aluminium Frame Sections
Step 3: Secure the Frame and Check Stability
Once all frame sections are connected, carefully inspect each joint. Make sure every connection is fully inserted and secure.
At this stage, the frame should hold its shape independently. Stability is critical, especially since the structure will be suspended above your exhibition stand.
A quick stability check prevents issues later during rigging and ensures compliance with venue safety standards across Australian exhibition centres.
Step 4: Install the LED Lighting System
Step 5: Apply the Tension Fabric Graphic
Step 6: Prepare for Rigging and Suspension
Once the structure is fully assembled and illuminated, attach the designated rigging cables or hanging hardware.
Australian venues have strict safety regulations for suspended signage. Always work with approved riggers or venue technicians to ensure correct installation from ceiling anchor points.
The aluminium frame is engineered for safe overhead suspension, but professional rigging ensures compliance and peace of mind.
Step 7: Final Checks Before Event Opening
After the banner is suspended:
-
Confirm the structure is level
-
Check that lighting is evenly distributed
-
Ensure graphics are properly tensioned
-
Verify power connections are secure
Taking a few extra minutes for final adjustments ensures your overhead display looks flawless when doors open.
Why Easy Assembly Matters for Exhibitors
Exhibiting is already demanding. From transporting materials across states to coordinating staff and marketing materials, there is enough to manage.
WaveLight® Casonara Hanging Banners simplify one of the most important visual elements of your stand. Their modular aluminium frame, intuitive connection system, and seamless tension fabric design make them ideal for repeat use across multiple Australian trade shows.