How to Choose the Right WaveLine® Hanging Banner Configuration for Your Booth
Updated: November 09, 2025
WaveLine® Hanging Banners deliver maximum overhead visibility while preserving valuable floor space for product demos and meetings. Whether you manage a single trade show or coordinate a national events program, choosing the right configuration ensures consistent brand impact, easier installation, and lower total cost of ownership. Below we break down practical, product-focused guidance to help you select the ideal WaveLine solution for your booth size and event goals.
General Information
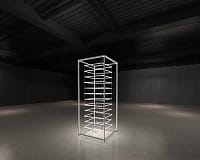
WaveLine Hanging Banners are modular hanging systems engineered for exhibition environments. Consequently they offer interchangeable fabric sleeves that slide over rigid frames, enabling fast graphic swaps and on-site updates. In addition, the structural frames are designed for repeated rigging, which means you can reuse components across multiple events while only updating printed sleeves.
Specifications
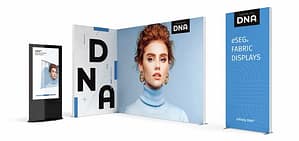
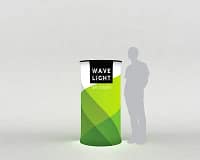
Sizes vary to match ceiling heights and booth footprints. For example, circular banners deliver 360 degree visibility, squares provide balanced sightlines, rectangles align with aisles, and tapered drum shapes create a visual focal point. Moreover, choose single-sided or double-sided textiles depending on venue orientation and attendee flow. Standard rigging kits support recommended load limits, while optional motors accommodate slow rotation for dynamic displays.
Product Highlights
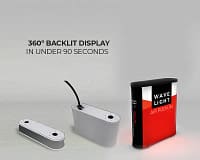
Key benefits include quick graphic changes, scalable sizes, and compatibility with internal LED lighting and rotation systems. Consequently, event teams can maintain high visibility without changing structural hardware. For those looking to review product options and configurations in one place, consider reviewing the full range to compare sizes, accessories, and pricing directly:
Explore our full range of WaveLine® Hanging Banners.
Components
Each WaveLine solution includes a rigid frame, a printed fabric sleeve, and a rigging kit. In addition, the rigging kit usually contains carabiners, steel cables, and connection hardware that meet common venue requirements. For events that require rotation or internal lighting, add the motor and LED kit as optional components. Also, keep a spare maintenance kit with extra carabiners, cables, and tape to reduce downtime between shows.
Design Features
Design choices should prioritize readability and brand clarity. Therefore use short, high-contrast headlines and avoid thin script fonts for long-range viewing. Furthermore, standardize sleeve templates so regional teams can localize text quickly while preserving typography and color consistency. Finally, consider double-sided printing in arena-style settings where sightlines cross multiple directions.
Material Quality and Portability
WaveLine sleeves are printed on durable, flame-retardant textiles suitable for repeated use. Consequently the fabric resists creasing and returns to shape after packing. Frames are lightweight yet strong, and they pack efficiently for transport. As a result, teams can move assemblies between venues with lower shipping volume and reduced handling complexity.
Setup Process
Setup typically completes within a few hours when coordinated with venue rigging teams. First, confirm venue rigging limits and permitted rotation speeds. Next, assemble the frame on the ground and slide on the fabric sleeve. Then secure the rigging cables and test load points. Finally, add lighting or a slow-rotation motor if required, and verify cable routing for a tidy appearance.
Use Cases
WaveLine hanging banners are ideal for large trade shows, multi-booth islands, and arena exhibits. For instance, use circular banners above demo zones for 360 degree visibility, and place tapered drums above keynote areas to draw attention. Furthermore, interchange sleeves seasonally to refresh campaigns while retaining the same structural investment.
Conclusion
In summary, selecting the right WaveLine Hanging Banner configuration comes down to matching shape and size to sightlines, choosing single or double-sided printing based on attendee flow, and planning for accessories like lighting and motors. Ultimately this approach maximizes brand exposure, streamlines setup, and lowers lifetime costs by enabling reusable frames with quick graphic swaps.