Updated: September 11, 2025
Step-by-Step Guide to Assembling the WaveLight® Air Wall
Introduction
The WaveLight® Air Wall brings bright, even illumination to your booth while remaining lightweight and fast to assemble. This guide walks you through the product features, setup steps, and best practices so your team can deploy a professional backdrop with confidence. Consequently, you will save time and create a polished presentation that attracts attention and supports conversations.
General Information
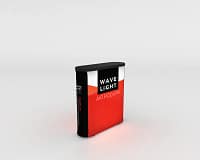
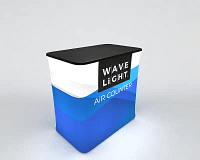
The WaveLight® Air Wall is an inflatable illuminated fabric banner designed for trade shows, retail displays, and events. It combines an internal inflatable core and an integrated LED harness to deliver a smooth, wrinkle-free graphic surface that photographs well. In addition, the system ships in a wheeled case, and the lightweight components make it easy to transport to any activation.
Product Highlights
The Air Wall stands out for its quick, tool-free assembly, consistent front-lit illumination, and clean visual finish. Moreover, it is compatible with multiple sizes and graphic options so you can tailor the display to your booth dimensions and branding needs. For more details and to explore ordering options, visit WaveLight® Air Wall.
Specifications
- Integrated LED strip and controller for uniform brightness
- Inflatable core with recommended PSI range for optimal tension
- Printable stretch fabric cover that slips on and secures tightly
- Wheeled transport case sized for easy airline or road travel
- Available in multiple panel widths and heights to fit standard booth layouts
Components
The kit includes the inflatable body, a fabric graphic cover, an LED harness and controller, power supply, inflation pump, cable clips, and end caps. Furthermore, the wheeled case stores all parts neatly, and spare connectors can be carried for peace of mind. Each item is designed to make the build intuitive and repeatable under time pressure.
Setup Process
Follow these steps for a reliable, wrinkle-free finish. First, unpack the case and lay out components near your intended backdrop location. Next, position the base and verify power access behind the stand so cables stay tidy. Then, connect the LED harness and test illumination to confirm even light distribution before inflating.
- Unzip the wheeled case and remove the inflatable body, power supply, and fabric cover.
- Place the base and check clearance for routing cables without pinch points.
- Attach the LED strip and controller, then power on briefly to verify brightness and evenness.
- Slip the fabric cover over the structure, aligning seams with the edges and seating the top corners first for smooth tension.
- Use the supplied pump to inflate steadily to the recommended PSI; watch for uniform tension from top to bottom.
- Attach end caps and side covers, then secure cables with supplied clips and tidy with gaffer tape if needed.
Design Features and Material Quality
The fabric is a high-quality stretch textile that resists wrinkles and accepts vibrant dye-sublimation printing, so graphics remain sharp under LED lighting. Additionally, the inflatable core is engineered for consistent pressure retention and durability, and the LED components are rated for extended use. Therefore, you get reliable performance across multiple events and environments.
Portability and Case-to-Ready Timing
The WaveLight® Air Wall packs into a compact wheeled case for efficient transport and storage. As a result, a trained two-person team can typically unpack and set up the entire display in minutes. Consequently, you will reclaim valuable setup time and reduce booth labor costs during events.
Use Cases
Use the Air Wall as a primary backdrop, a product highlight wall, or a media-friendly photobooth surface. Furthermore, the crisp illumination improves video interviews and social media content, while the seamless graphic surface reinforces brand messaging. In trade show rows and retail spaces alike, the Air Wall helps you stand out and drive conversations.
Pro Tips and Quick Checklist
Seat the fabric from the top corners first to prevent diagonal ripples, and bring microfiber cloths for a final wipe to remove dust. Also, label the inside top edge of graphics to speed orientation. Finally, dim ambient lights slightly when filming so the built-in LEDs provide primary illumination, which reduces glare and improves contrast.
- Confirm power availability and bring a spare extension lead.
- Pack microfiber cloths for a pre-open wipe-down.
- Label the inside top edge of your graphic for fast orientation.
- Carry spare LED connectors and gaffer tape for cable management.
Conclusion
The WaveLight® Air Wall delivers a blend of bright, even lighting and fast, tool-free assembly that is ideal for exhibitors seeking a high-impact backdrop. Because it is portable, durable, and designed for repeatable setup, you will enjoy reliable performance across events and a sharp visual presence that supports brand storytelling. Therefore, invest in the Air Wall to streamline your setup and make every booth moment count.