Step-by-Step: How to Assemble the WaveLine® Hanging Banner in Minutes
WaveLine® Hanging Banners deliver instant overhead impact while preserving valuable floor space for demonstrations and meetings. In addition, their repeatable, tool-free construction keeps teams efficient on tight event schedules. The following product-focused guide walks you through components, setup, safety checks, and practical uses so you can plan and execute fast, reliable installations.
General Information
WaveLine® is engineered for trade shows and retail environments where visibility and flexibility matter most. Because the system uses labeled tubes and push-button connectors, teams can assemble the frame quickly and consistently. Moreover, the fabric sleeve is dye-sublimated for vibrant, long-lasting graphics that remain readable from a distance.
Components and What’s Included
Each WaveLine® Hanging Banner kit includes labeled aluminum frame sections, push-button connectors, a full-bleed dye-sublimated fabric sleeve, a durable zip closure, and recommended suspension hardware specifications. Furthermore, many kits come with a soft padded carry case for easier transport and organization.
Design Features and Material Quality
The frame is lightweight yet sturdy, and the aluminum profile resists bending over repeated use. In addition, the fabric sleeve is printed with colorfast inks and treated for fire retardancy, so it meets most venue requirements. Consequently, visuals stay crisp and color-accurate while the material withstands frequent packing and reprinting.
Specifications and Technical Details
Standard WaveLine® sizes provide high visibility at varied ceiling heights. Typical specifications include modular frame lengths, measured load ratings for suspension, and recommended safe distances from lights and sprinklers. Therefore, confirm venue rigging limits and the banner’s weight before finalizing your setup plan.
Step-by-Step Setup Process
First, lay out all components and perform a quick inventory. Next, connect the labeled frame sections until each push-button locks into place. Then, slide the dye-sublimated fabric sleeve over the completed frame, align the graphics, and zip the closure for a smooth, crease-free finish. Finally, follow the venue rigging plan and coordinate with approved riggers for suspension.
Pre-Show Checks and Prep
Standardize sleeve templates so regional teams can localize text quickly. Also, export artwork at full scale with bleed and safe areas, and test legibility at 10 to 15 metres. In addition, keep fire-retardant certificates and load-rating documentation ready for inspections to avoid last-minute delays.
Rigging Coordination and Safety
Work only with certified riggers and use rated cables specified for the banner weight. Moreover, verify load ratings, clearances from lighting and sprinkler systems, and follow the venue’s rigging plan to maintain compliance. To simplify repeats, use a checklist that standardizes the build across shows and teams.
Use Cases and Portability
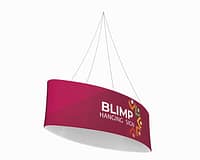
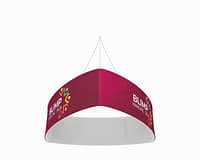
WaveLine® hanging banners perform well at trade shows, mall activations, and conventions where sightlines matter. Because they conserve floor space, they pair effectively with demo stations and meeting areas. Additionally, the lightweight frame and padded case make transportation and staging straightforward, while the replaceable sleeve supports frequent campaign changes.
Product Highlights and Next Steps
In summary, WaveLine® combines fast, tool-free assembly with durable materials and venue-friendly safety features. Therefore, you benefit from clear overhead branding, rapid turnarounds between shows, and reusable hardware for long-term value. Next step: Explore our full range of WaveLine® Hanging Banners.
Conclusion
Overall, WaveLine® Hanging Banners streamline overhead branding from unpack to rigging, and they support rigorous event schedules with consistent, repeatable builds. Consequently, investing in this product reduces setup time, protects investment through reusability, and boosts visibility where it matters most. Finally, follow the checklist and rigging best practices to ensure safe, professional installations every time.